
Written September 13, 2008. Tagged Photoshop.
In Photoshop, the "Multiply" blending option is very handy. I use it to color line art without painting over the lines, and to try out colors for stuff in my home.
To use it, right-click on a layer, select "Blending Options…" and then set "Blend Mode: Multiply". Or use the Layer > Layer Style > Blending Options… regular menu item.
You will also want a layer below that one. You may need to right-click the first layer and click "Layer From Background…" if it is a background – you won't be able to put layers below it otherwise.
Multiplying two layers basically means, to my understanding, that the top layer will darken the bottom layer. Black in the top layer is opaque. Pure white is completely transparent, showing the background layer as-is. Near-whites are near-transparent.
So I use it for two things:
Actually it's my girlfriend (an artist) that uses it, but I usually set it up for her.
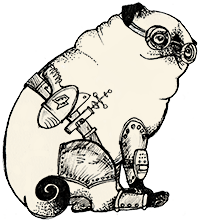
Put some scanned or drawn-digital line art in the top layer and set blend mode multiply.
Then paint on a layer under it. The colors will show right through the white parts of the drawing, but the lines will never be painted over.
![[Example]](/uploads/multiply-pug.png)
Note that this only prevents you from painting on top of the lines; nothing prevents you from painting outside them. In the example image above, I used the "Quick Selection" tool (with the "Contiguous" option checked) on the "Pug" layer to select everything outside the lines. I can then change to the "Color" layer and press "Delete" to remove the excess color.
If my girlfriend and I are not sure what color we want for e.g. a rug or our kitchen cabinets or walls, multiply is also useful.
You should first make sure that the thing you're coloring is white. Our kitchen walls and cabinets are. When trying rug colors, we just used a white sheet as a dummy.
If you have another color, this might not be the method for you.
So I put a photo of e.g. my kitchen cabinets in the top layer and set blend mode multiply. I create a lower layer to paint on.
I used the polygonal lasso tool to outline (select) the areas to color, then I just painted them in, in the lower layer, with the paint bucket tool. If you just want a rough idea of how the colors will look, you can make a pretty rough outline. Whether or not the surrounding areas are light or dark will also affect how sloppy you can be.
Once you have colors in your lower layer, you can use Image > Adjustments > Hue/Saturation… to change the color around.
![[Example]](/uploads/multiply-cabinets.png)
What's nice about this, as opposed to just painting on top of the photo, is that the colors aren't flat. It will show through lighter in lighter areas of the image, and darker in shaded areas.
In general, Photoshop is really useful for home decoration. Other than try colors, we've also used it to figure out things like where to put shelves and art, what art to get, and whether to paint the pineapples on our bed frame (we did).